Well-defined margins are essential for achieving well-fitting restorations. It is crucial to ensure that the margins are designed and prepared correctly.
Fine finishing burs
Fine finishing burs should be used for shoulder preparations; coarse diamond burs should be used for axial and occlusal reductions. Rougher surfaces generally enhance cement retention and adhesion.
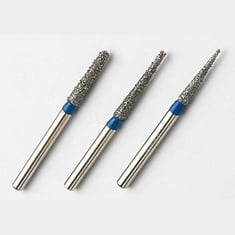 Image left to right: coarse for axial and occlusal reduction; chamfer margination; bevels.
Manufacturers provide bur kits to assist clinicians in purchasing diamond burs for all clinical uses.
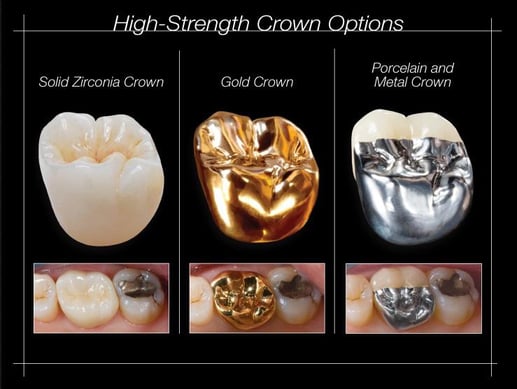
Your choice of margin preparation depends on the type of crown restoration, material, and location (aesthetics, periodontal). The types of margins and when to use them are outlined below.
Types of margins
Knife-edge or feather-edge margins are suitable for:
Less tooth reduction is required with knife-edge or feather-edge margins. This preparation design is unsuitable for layered zirconia restorations and may cause issues with fitting and/or fracture.
Bevel-chamfer margins are suitable for:
- Full-cast crowns
- Full zirconia crowns
- PFMs
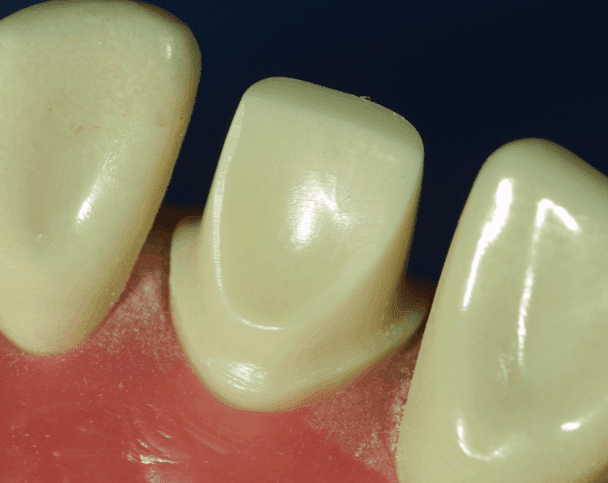 360-degree chamfer margin suitable for full cast, all ceramic and PFM crowns.
Bevel-chamfer margins offer improved marginal fit when compared to knife-edged margins. This margin preparation is not optimal for layered zirconia or IPS e.max® crowns.
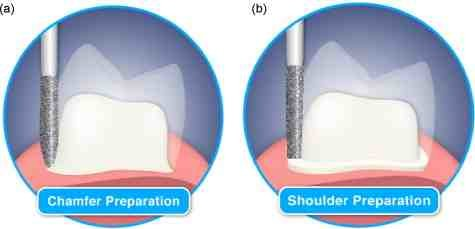
Chamfer margins are suitable for:
- Full-cast crowns
- Full zirconia crowns
- PFM crowns
 Chamfer margins provide a better marginal fit between restoration and tooth surface. They are less suitable for layered zirconia and IPS e.max restorations.
Shoulder or butt-joint margins are suitable for:
- Full zirconia crowns
- Layered zirconia
- IPS e.max
- LiS2
Margins are a function of the shape of the bur at the apical end.
Shoulder-beveled margins provide a passive fit and minimize potentially dark lines at the margin. This preparation is recommended for LiS2 and layered zirconia. Care must be taken to ensure proper isolation of the margin during preparation; this may be done with gingival retraction before preparation and the use of end-cutting burs.
Shoulder-bevel margins are suitable for:
- Full-cast crowns
- PFM crowns with porcelain shoulders
Shoulder-bevel margins generally result in accurate marginal adaptation and clinically acceptable marginal fit. Metal collars may be visible and should not be used where esthetics are a concern. They are not an optimal choice for layered zirconia crowns.
Isolating preparation margins is critical for well-fitting crowns. Gingival healthy tissues are also necessary, which minimizes blood contamination of the scan or impression. If your dental laboratory technician cannot see the margins of a conventional impression or if a digital scanner fails to record the margins satisfactorily, there is a high risk that the Quality Control person will reject the case.
It is not acceptable to proceed with unsatisfactory impressions or scans. If the case goes ahead, it will likely result in open or short margins, and the case will have to be redone with a new impression or scan.
Digital technology allows data to be captured and visualized, allowing the opportunity to analyze tiny details that are not readily visible on conventional fixed prosthodontic impressions. However, conventional principles still apply in that the margins must be isolated and visible.
Achieving an Excellent Margin Scan with Your IOS

Although digital impressions can provide exact images, there are several important factors to consider.
Preparations have been completed with 0.5mm subgingival margins; tissues are ready for retraction.
Acquiring an accurate sub-marginal line of sight
The image displayed in the mirror is the image the scanner will capture. It should show tooth structure 0.5mm apical to the margins. Dental labs frequently receive digital impressions where moisture and tissue have been inadequately controlled. The margins must be visible and clearly defined.
Similar to conventional impressions, digital scanners only capture visible tooth structures. Your techniques for digital impressions must allow you to visualize tooth structure apical to the margins.
Retracting Soft Tissue
Retracting soft tissue is best achieved by packing cords into the sulcus before making impressions.
- Sulci vary in size, shape, and depth.
- Retraction cords are available in different diameters and different materials.
- Braided cords generally don’t unravel with packing.
- Sulci are usually thinner in the apical regions and become progressively wider at the gingival crest. In cross-section, sulci are generally V-shaped.
- Therefore, smaller diameter cords should be placed first (000), followed by a thicker cord (00), and finally by the thickest cord, if needed (0).
- Clinicians typically start in the interproximal regions, where the sulcus depths are generally deeper. Minimal pressure should be generated during these procedures.
- Tissues are retracted with 000 cord placed into the sulcus first, followed by 00 cord. All margins must be visible.
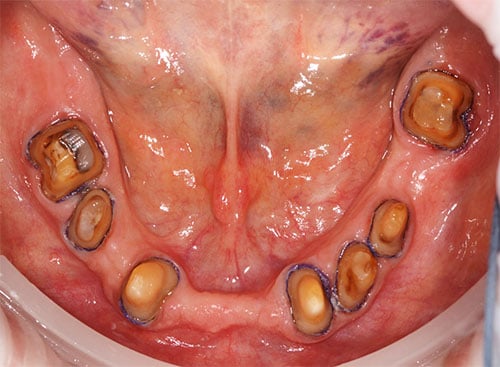
In many cases, at least part of the preparation is apical to the free gingival margin. If the tooth preparation has subgingival margins, the tissue must be separated from the margins to achieve accurate scans or impressions. High-clarity scans are achieved with excellent quality retraction that reveals clear margins.
Inflamed gingival tissues will frequently bleed, and isolating the margins may be demanding. It is essential for scans and impressions that there is no active hemorrhage and no saliva present during impressions or scans.
Supragingival margins offer clear visualization of margins, but often teeth that are being prepared for crowns have previously been restored with sub-gingival margins. In these cases, the health of the gingival tissues has been frequently compromised.
Using Retraction Cord
Retraction cord moves gingival tissue laterally away from the margin preparations. It is gently placed into the sulcus with a thin packing instrument. Retraction cord can displace gingival sulcular tissues effectively.
However, it might also cause bleeding. Hemostatic agents are available that can be added to the cords or placed onto the bleeding sites before the impressions or scans. It is essential to eliminate bleeding before proceeding.
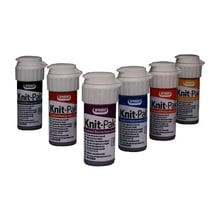
Retraction cords are available in multiple sizes, materials and manufacturers.
Double Cord Technique
Using multiple cords can enhance tissue displacement, and margins may be more easily recorded. If the patient has an especially deep sulcus, using two cords minimizes tissue from collapsing over the margins during scanning or impressions.
When packing the cords, pack a smaller diameter cord first. The first cord generally will not expose the margins. Pack a larger diameter cord next; this will typically expose the margins.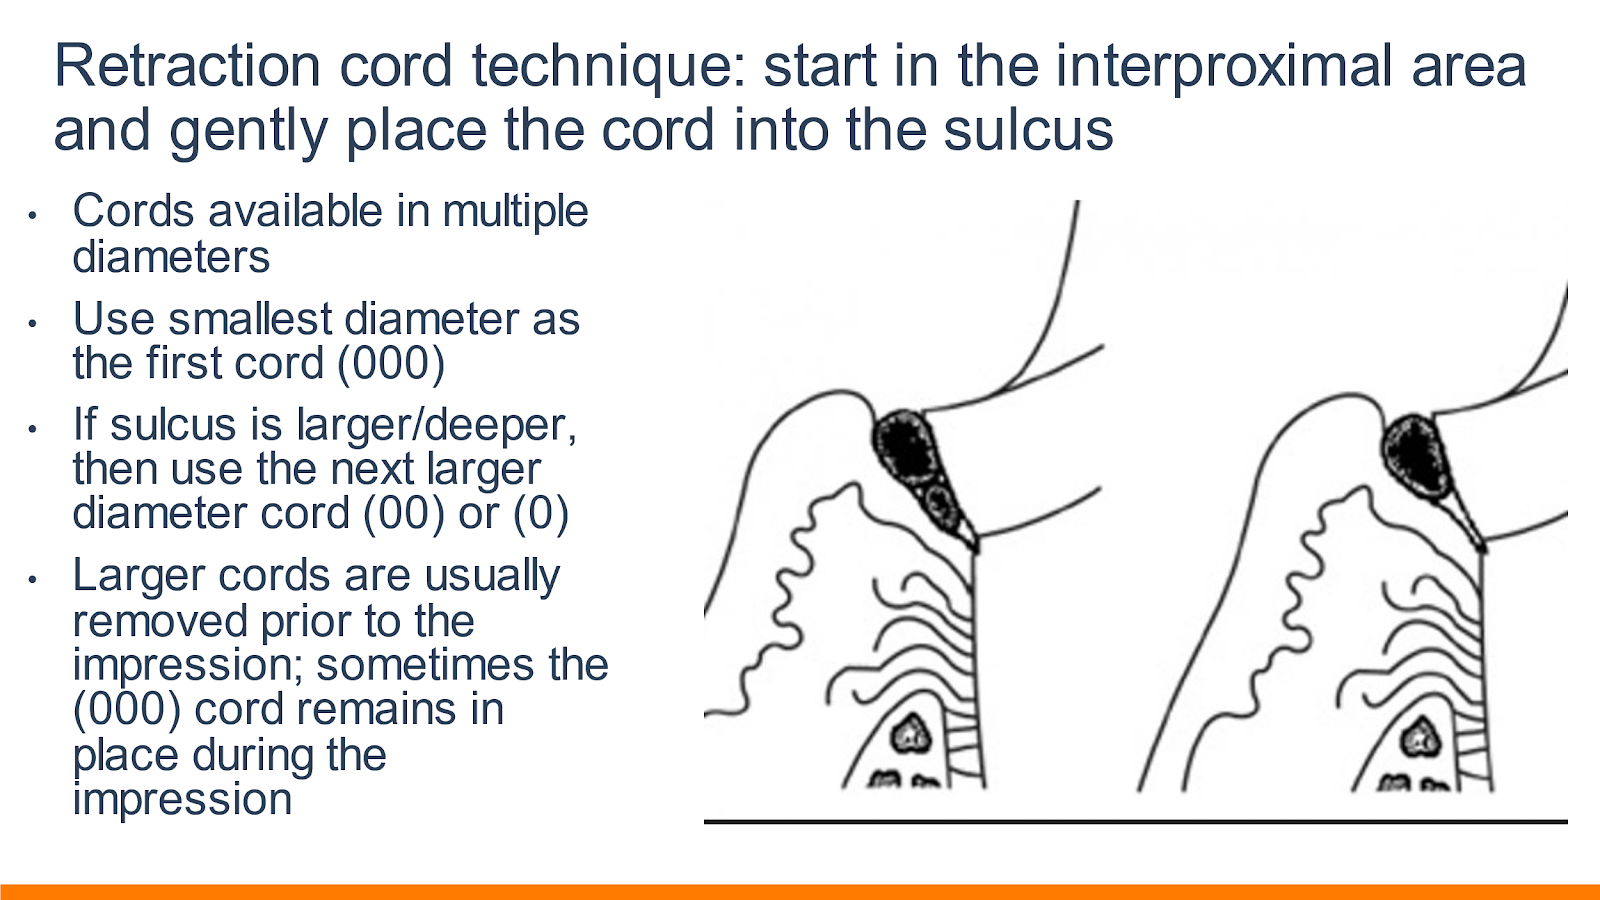 Image source: DDS Lab
In some cases, a third larger diameter cord may be needed to expose all margins fully. The larger cords are left in place for at least five minutes before removal. Sometimes the initial thinner cord remains in place during the scan or impression.
Using a soft tissue laser and retraction paste to expose margins
A soft tissue laser can help expose subgingival margins and remove unhealthy and inflamed gingival tissue that may be covering the margin or creating excessive bleeding. Great care must be used, as lasers can make irreversible changes to gingival tissues.
- Removing inflamed tissue also helps to stimulate the regrowth of healthier tissues.
- After treating areas with a dental laser, hydrogen peroxide solution removes tissue debris.
- More moderately inflamed areas can be treated with a retraction paste that helps to provide hemostasis and physical separation between the margin and tissue.
- The paste is injected into the sulcus, and a firm cotton roll is placed over the paste.
- The patient bites down on the cotton for between two and five minutes, after which the paste is rinsed away, leaving a clear view of the margins.
The correct margin preparation and tissue management techniques are crucial to fabricating and fitting high-quality restorations, whether using a conventional or digital impression. DDS Lab has an excellent chart for improving your margins. This chart is available for download and is a great reference tool.
Our certified and experienced technicians are always available for case consultations and can assist you with case planning.
Click here to schedule a consultation with our technical team › 
Images Courtesy of Carl Drago, DDS , MS