A zirconia screw-retained bridge is a popular choice for clinicians who wish to provide patients with the most ideal esthetics. This type of restoration offers several advantages. One of the most appealing qualities of this bridge is its easy retrievability. An easily retrievable restoration is a good solution if the patient is likely to require regular maintenance or removal of the bridge for professional cleaning. Additionally, zirconia attracts less plaque, making it easier for the patient to maintain good oral hygiene and healthy implants. Zirconia screw-retained bridges are CADCAM designed and milled, which eliminates casting distortion and offers a predictable, precision-fitting appliance.
The framework, milled from a solid block of zirconia, provides precise contours for porcelain layering, if required. At this stage, it’s preferable to try-in the framework and take a new bite registration. Once the fit has been verified, the bridge is layered with porcelain, glazed, and hand-finished. At this stage it’s ready for fitting. Take care when placing a zirconia screw-retained bridge.
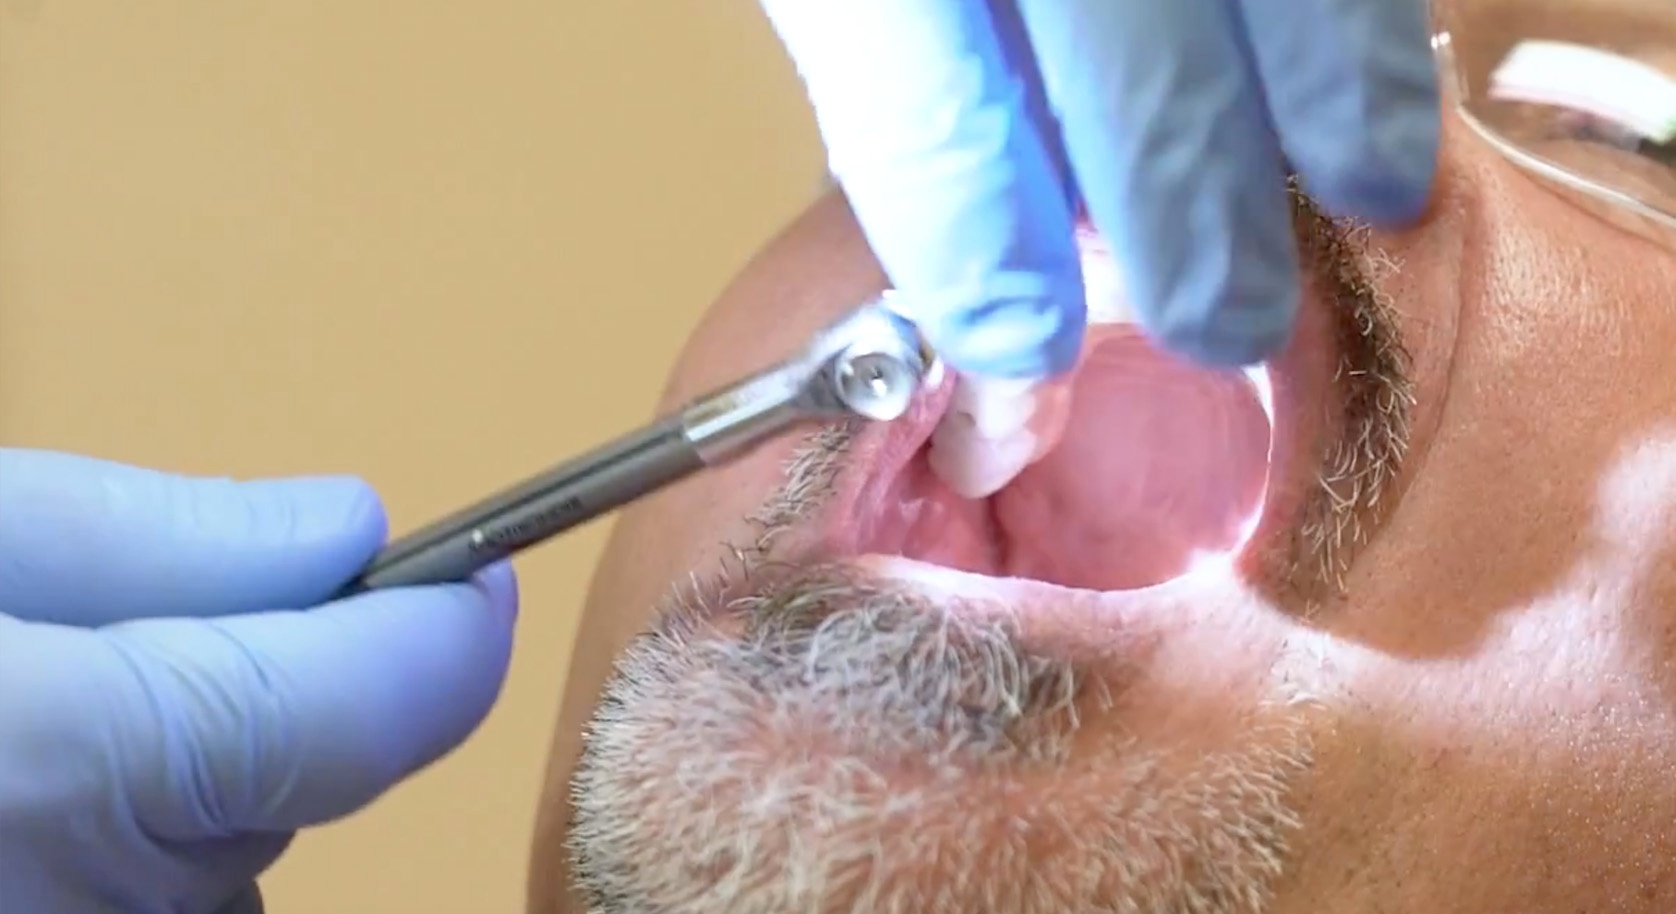
Points to Remember When Removing the Healing Caps
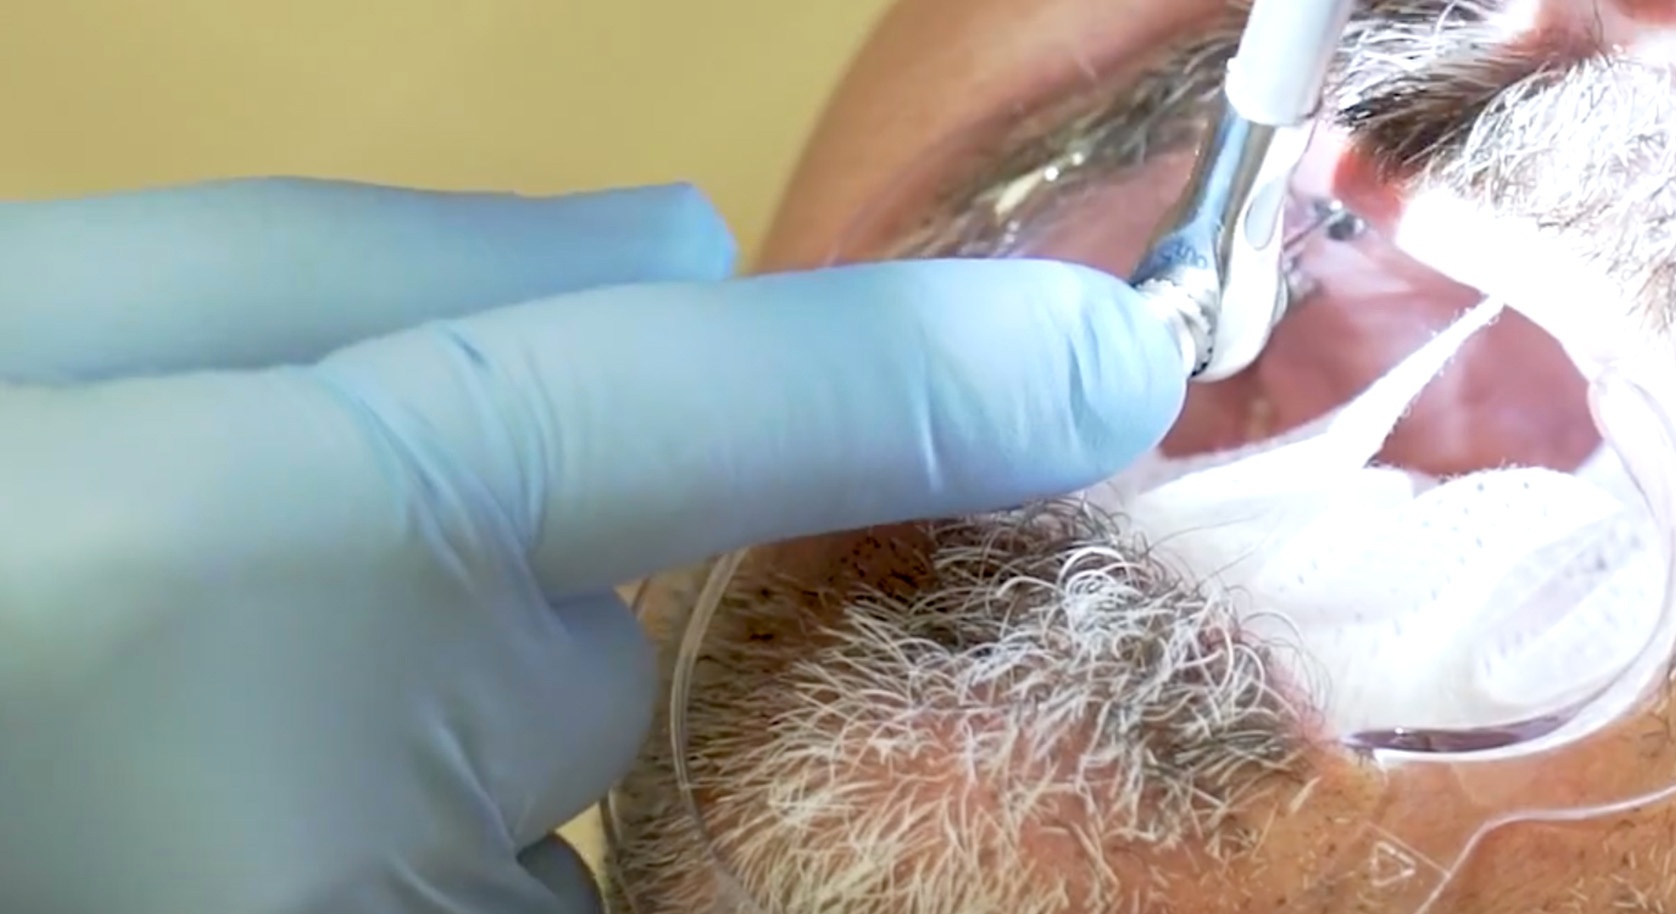
The first stage in fitting the bridge is to remove the healing caps.
- It’s important to be aware that the healing caps are very small, increasing the probability that they may fall into the patient’s throat and easily be swallowed.
- To prevent swallowing, place gauze or a similar material into the patient’s mouth.
- The healing caps do not need to be removed in any particular order.
- To begin removing the healing caps, it is easiest to first use a torque wrench to loosen the caps and a screwdriver to fully unscrew and remove them.
How to Seat a Lower Bridge
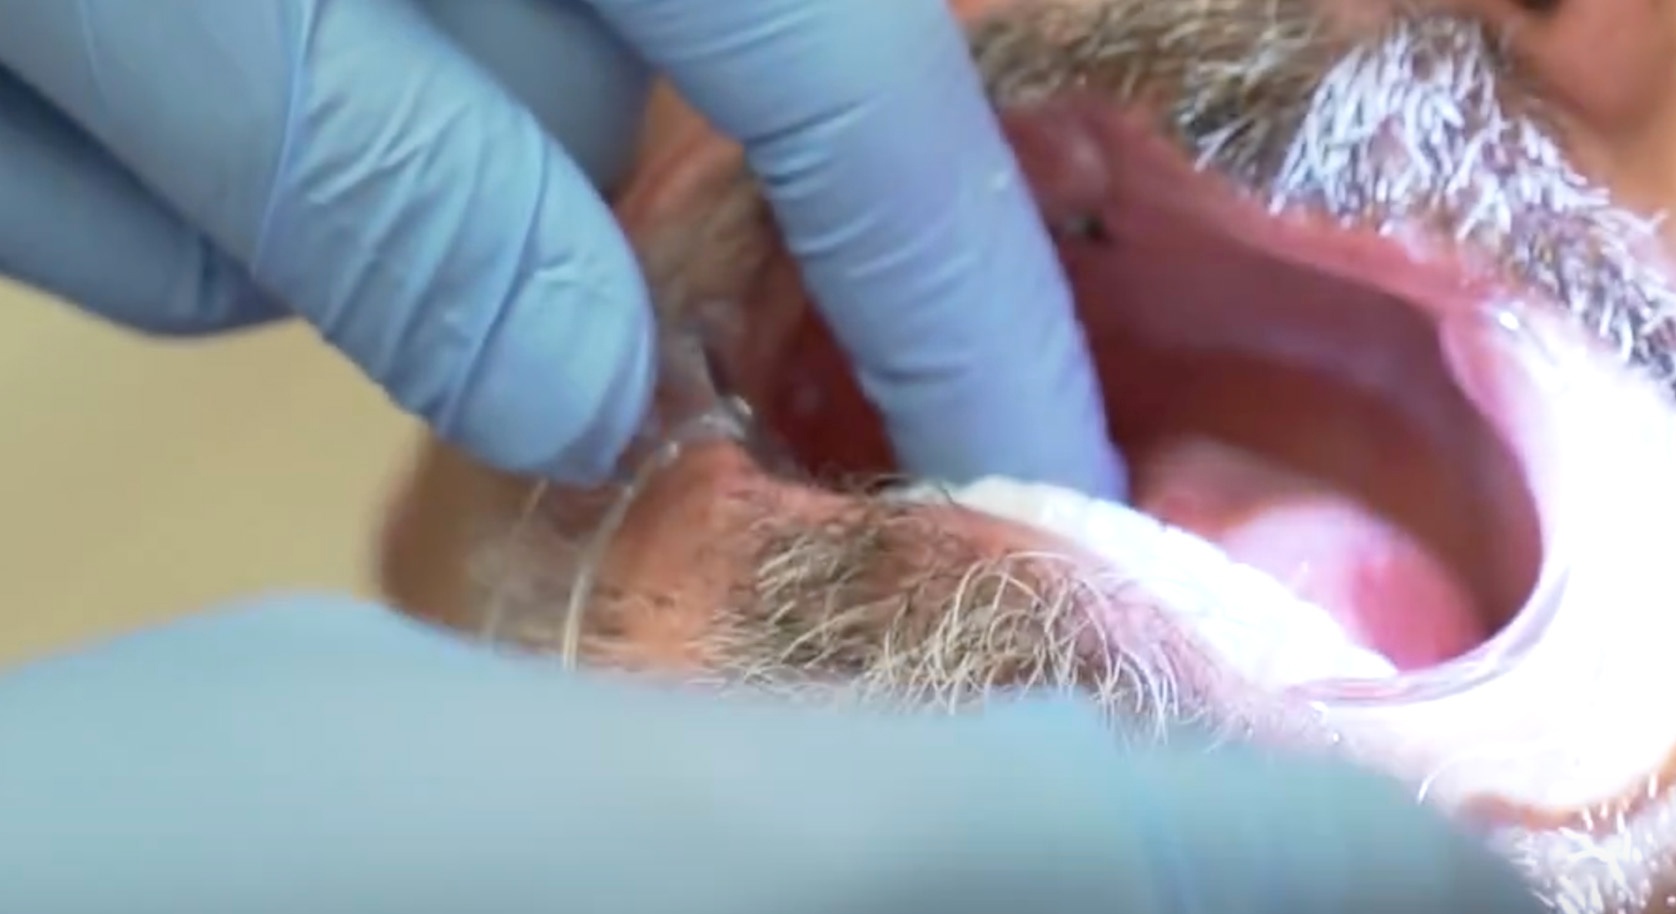
Once the healing caps are fully removed, you can begin to seat the zirconia screw-retained bridge.
- Begin by evenly aligning the bridge with the implants, so it fits into place.
- When the bridge is evenly seated, insert the screws and tighten them.
- Next, tighten or torque the screws. When fitting a lower and upper bridge, it isn’t necessary to adjust the bridge. Adjustment is carried out once the upper bridge is seated.
Placing a Multi-Unit Abutment
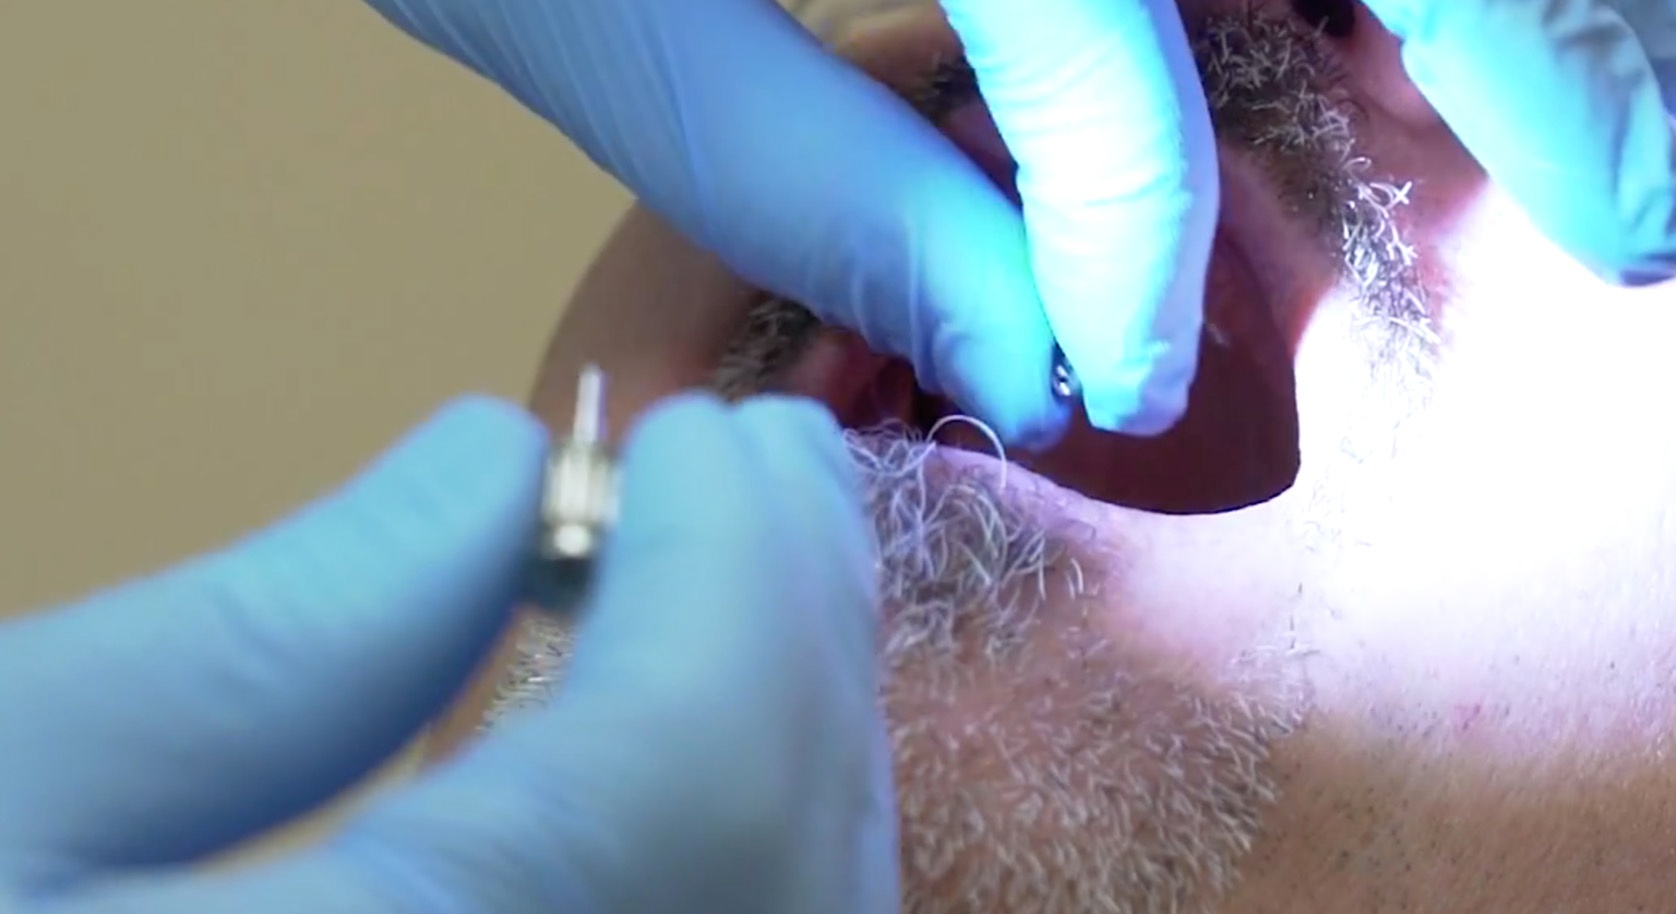
Depending on the angulation of the implants and whether a correction is required, you may need to place a multi-unit abutment. The ideal planning objective for a zirconia screw-retained bridge is to project the access holes into the cingulum area of the anterior region or into the mid-occlusal lingual aspect of the posterior teeth. Otherwise, angling the screw access hole toward the facial aspect of the anterior teeth causes esthetic problems. One way to deal with this problem is to redirect the screw access hole lingually using a multi-unit abutment. A multi-unit corrects the angulation of the implants.
Normally the multi-unit abutment remains on the model, allowing you to see the orientation in the patient’s mouth. However, sometimes it’s necessary to unscrew the multi-unit abutment from the model to place it directly in the patient’s mouth.
How to Seat an Upper Bridge using Multi-Unit Abutments
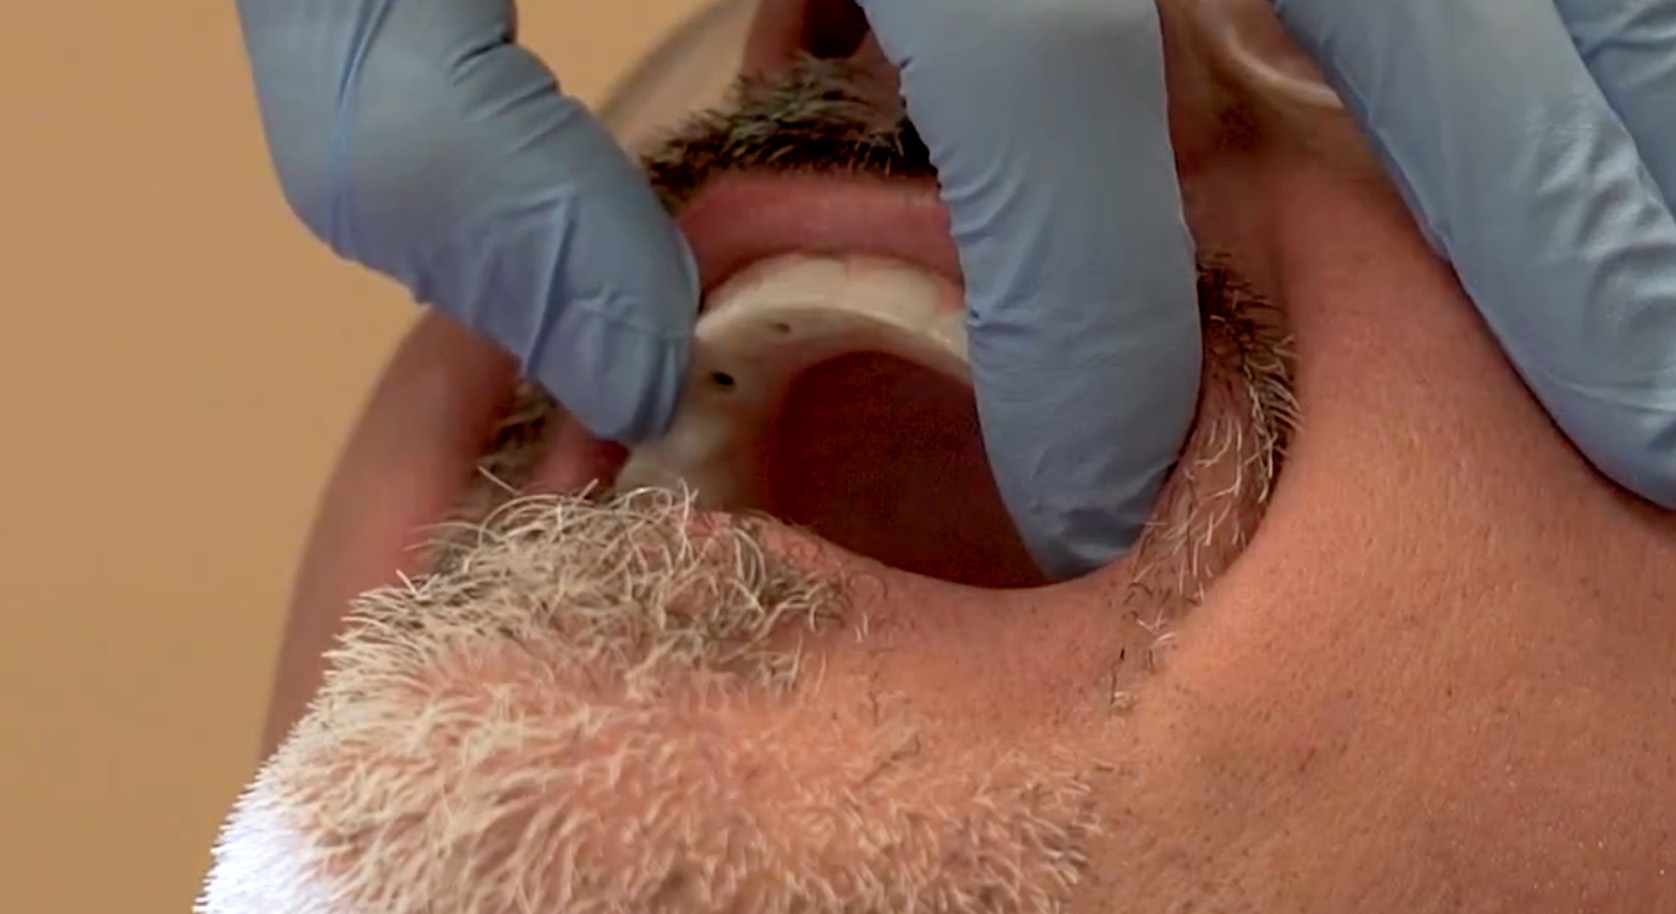
- When seating an upper bridge using multi-unit abutments, gently fit it down until it feels secure and doesn’t rock back and forth. It’s normally very easy to tell when a bridge is properly seated.
- If the bridge doesn’t feel secure or is rocking, change the orientation of the multi-unit abutments until it seats securely.
- Once the multi-unit abutment is properly in place, begin to fit the screws.
- When the screws are all in position, torque the bridge to hold it properly in place. At this point, make any necessary adjustments to the occlusion.
Using the Correct Torque Measurement
The final stage, after making all the adjustments, is to torque the screws in place. These adjustments should be properly measured using the correct torque measurement. The Newton centimeter (NCM) is the System International (SI) measurement unit of torque.
Our experienced technical team is here to assist you should you wish to discuss a case in more detail.
Click here to schedule a consultation with our technical team »

Reference
https://www.dentalcetoday.com/courses/180%2FPDF%2FDT_Sept_14_NPR_Tischler_fnl1.pdf
https://www.for.org/en/treat/treatment-guidelines/edentulous/treatment-options/implant-prosthetics-fixed/screw-retained-4